 Building Wrist Strength for Your Yoga Practice Wrist injuries are common in yoga because we are constantly moving in and out of poses that put pressure on our wrists. A lot of poses that are incorporated into the daily practices of most Yogis (Downward Dog or Plank, for example) put pressure on our wrists, particularly when moving between them. These weight-bearing movements need proper muscle strength in order to avoid injury. This is especially true if you plan on advancing your asana practice into more physically demanding postures, such as arm balances or inversions, which rely on your wrist joints to support your body. Personally, the more I advance my own practice, the more I find myself spending time putting strain on my wrists. Consequently, it becomes even more important to make sure I spend time building strength in order to avoid injury. Generally, one of two things happen that lead to pain and/or injury in your wrist(s). Reaching the end of your range of motion (ROM) with arms fully extended in weight-bearing exercises such as a plank can place undue stress on your wrist joints to compensate for the inadequate range of motion. If you don’t have the wrist flexibility, your body will rely on your joints to support you (which is why I have included a wrist stretch at the end of my strengthening exercises). Either of these two issues can cause pain in, or injure the wrists. They are common and are easily preventable. I decided to incorporate wrist strengthening exercises into my practice due to the reasons listed above. For me, many advanced asanas in my current practice require my shoulders to come past my wrists, like in crane pose, or pressing into handstands. When I first started, I would frequently feel pain or weakness in my wrists and knew it couldn’t be a good thing. Unfortunately, basic conditioning moves (like the ones which follow) are often overlooked in yoga classes. I chose these exercises (which I do 3-5 times per week) while working alongside my yoga teacher during my studies, as well as consulting with some of my weightlifting and gymnast friends who are similarly afflicted by such injuries. Start small, with three sets of ten repetitions per exercise, building up over time to four or five sets of ten to twenty repetitions. All of this leads me to the following five wrist strengthening exercises demonstrated in the minute-long slideshow at the top of this post, and below in collage form, with instructions to follow (Sorry to my cell phone viewers, the location of the picture collage might be at the top of the page until I can get this location bug fixed. My apologies.) : 1. Towel Wringing We all know how this one goes. Anyone who has ever gotten their clothing soaked or wrung out a dish towel will be very familiar with this exercise. Take a towel and hold it parallel to the ground with your arms extended in front of you. Twist one wrist forward and one wrist back as if wringing water out of the towel repeatedly. Who knew all those years doing dishes were actually helping you gain wrist strength? 2.Rapid Fists I promise this is not as weird as it sounds! Extend your arms parallel to the ground and open your hands as much as you can, reaching all the way through your fingertips. Then squeeze into a fist as tightly as you can. Rapidly repeat this motion. You can also play with bending your wrists back or down to see how that works different groups of muscles in your hands and forearms. 3. Wrist Curls For this you will need hand weights, a soup can, or a (filled) water bottle like in my slideshow above. Rest your forearm, palm up, on your leg or a table (or some other level object), parallel to the ground with your wrist over the edge. Curl your wrist up and down. 4. Pronated Wrist Curls This is exactly the same as #3, but you will set yourself up with your palm facing the ground instead of the sky. 5. Wrist Hammers Take whatever you were using for a hand weight and hold it by your side as if you were holding a hammer in your hand (again, arms down and by your side, or in the parallel to the floor position described in step #3). Pretend that your weighted object is a hammer and move only your wrist to tap down that invisible nail, and then bring it all the way back up, and back to neutral; again moving only your wrist. This one will feel slightly awkward at first and your body’s natural tendency will be to flex at the wrist as you move the “hammer” up. Keep your wrists neutral, not flexed during this exercise. 6. STRETCH IT OUT Don’t forget about your wrist mobility. There are a number of ways you can achieve the same stretch as in my slideshow above, without having to stretch as deeply. Try, for example,bending one arm and using the other hand to gently flex back the fingers and palm of the other hand and then slowly extend your forearm to the ground. This is a much gentler way of achieving the same muscle release and you can build up to more intense stretches. Thank you all for taking the time to go over my recommended wrist strengthening exercises for yogis. Remember, while I am a trained yoga instructor, I am not a doctor. If you feel pain or severe discomfort in your wrists and/or have had serious injuries, please consult a medical professional before trying any new exercise regimen. Xo, Cheryl
0 Comments
 My Top 5, All Natural Home Remedies to Soothe Chronically Itchy Skin I have eczema, or chronic contact dermatitis, or I’m celiac and have the skin reaction called dermatitis herpetiformis. No one really knows, not even my doctor parents. But to be fair, I’ve never really been tested for anything. What I do know is that I’ve had small, embarrassing, itchy rash patches for my entire life, and after 30 years of it, I’ve developed some decent methods to calm the itch and heal my skin. I mentioned this on my social media accounts and the response was incredible; I was given so many interesting home remedies to try. There are a surprising amount of similarly afflicted people. Because of the response I got, I decided to do a little research using myself as a test subject, and wanted to share what has helped me soothe the flare ups. When I was little I used to get small itchy bumps on my elbows and the backs of my knees every summer. Eczema and hay fever run in my family, so naturally it was assumed the problem was along those lines. I used over the counter cortisone cream to mitigate the symptoms and just dealt with it. Eventually it went away, so I figured I’d outgrown the problem. Unfortunately, about three years ago, I started getting symmetrical itchy rashes along my neck when I wore jewelry. Because they only popped up after I wore a necklace and/or collared shirts in the heat, it was assumed it was contact dermatitis. Maybe it was, maybe it was heat rash, maybe it was something entirely different...who knows. I just know that cortisone didn’t work, scratching spread it, but if I left it alone, it would fade after about a week. Fast forward to a few months ago. Symmetrical rashes began appearing on the backs of my knees, then then inside of my arms, then my neck, then my chest, then my stomach. These rashes were different. Cortisone did nothing to help, no amount of eczema lotion or allergy pills alone took out the burning, itching sensation. I wanted to rip my skin off! Once again, doctors can’t tell me what my rash is. Unfortunately, my insurance doesn’t cover allergy testing or expensive dermatology visits so my regular doctor could only do so much. I couldn’t just ignore the problem anymore, and I knew I had to do something. Knowing that three members of my family are celiacs and that celiac can present itself in a similar rash, along with dairy and gluten sensitivities, I decided to cut gluten and dairy out of my diet in case my rash was food allergy related. It seemed to help, and until I find out the actual cause of my rashes, I’ll have to keep my diet this way (however if you can get allergy tested or see a dermatologist, do that first!!). Changing my diet has mitigated the spread and frequency of the flare ups, so far, but the itch…...and the burning…...I had to find a solution. What I found that helped immediately, is what I discovered with a little research. 1. Goodbye hot showers. Hot showers are wonderful, but they dry your skin out and dry skin leads to itchy skin. Itchy skin leads to scratching which leads to more rash outbreaks, or scarring, or infection. Just don’t risk it! Lukewarm showers aren’t the best, I’ll admit it. But, they make a world of difference in the moisture content of your skin. 2. Goodbye fancy, fragrant soaps and lotions. Seriously, the fancy, expensive stuff smells amazing. However, in reality, they don’t always do much to help your skin. Instead go for body washes and lotions that are approved for treatment of eczema. Or look into ones with colloidal oatmeal and/or aloe vera as these sooth the skin and help lock in moisture. Also, another tip is to moisturize as soon as you towel off after your shower or bath. Your skin is more absorbent then, and the lotion will be more effective.. 3. Hello cold compresses. Cold compresses are amazing and they will become your new best friend. If you are tempted to itch, slap, or rub your skin, put an ice pack on it. Not only will the ice help numb the pain, but also it will remove some of the redness and swelling. No ice? Use a soda can or cold bottle of water. Anything significantly below your body temperature will help. 4. Hello tea tree and coconut oils. These two are my two new best friends. Both have soothing and antiseptic qualities and both are all natural. Tea tree oil is rather harsh, so if your skin is super sensitive, I’d recommend mixing it with your coconut oil or diluting it with water before applying it directly to the flare up. Give it a few minutes, and you should feel soothing tingles as the sting and itch fade. Personally, I cover my rash with tea tree oil in the morning, wait five minutes and then rub coconut oil all over myself. I do the same thing at night. Coconut oil can be used on its own to remove the itch and moisturize the skin and is safe to apply as often as needed. I carry a small jar around with me throughout the day and reapply whenever I can’t tolerate the itching anymore, or when my skin gets dry, or whenever I want to smell coconutty. 5. Don’t forget to keep it up. When your flare ups fade, don’t forget to keep moisturizing. If your skin dries out and you start scratching, you might be back at step one before you know it! I hope the above five tips help some of you out there dealing with skin problems. Effective at home remedies can be hard to find and differ for everyone. I recommend taking my above tips and doing some research on your own to find what best suits you. I am in no means a doctor or licensed medical professional, I’m simply sharing what works for me after dealing with a lifetime of itchy skin flare ups. Here's some solid scientific research, and some more uses for both tea tree and coconut oil beyond what I mentioned above. :)
Melaleuca alternifolia (Tea Tree) Oil: a Review of Antimicrobial and Other Medicinal Properties: http://www.ncbi.nlm.nih.gov/pmc/articles/PMC1360273/ Top 10 Tea Tree Oil Uses and Benefits: http://draxe.com/tea-tree-oil-uses-benefits/ 20 Coconut Oil Benefits & Side Effects: http://draxe.com/coconut-oil-benefits/ 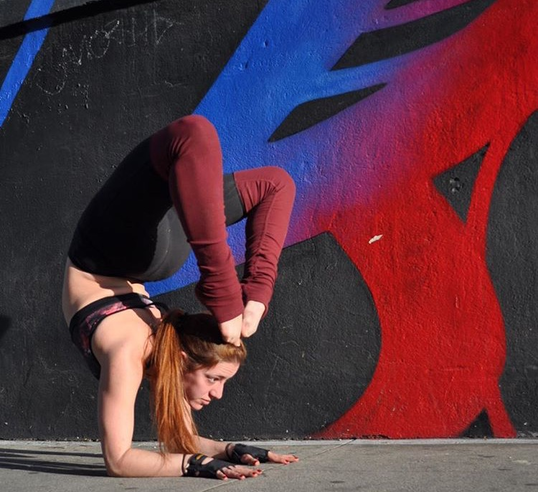 Arts District LA. Wearing Alo Yoga and Yoga Paws. Photo taken by @brad_yoga. I started really doing yoga when I was studying for my second bar exam in the summer of 2012. I had studied for a different state’s exam the previous year, and by the time the test rolled around, I was an unrecognizable ball of nerves and legal jargon. This time around, I was looking for a way to get a good workout and relieve some stress while I was going through studying hell. I had previously seen poses I thought were cool and looked good in pictures while browsing the internet for home workout plans. I would try and copy those yoga poses with extreme discipline, in my spare time. The goal was always to reach what I thought was the full expression of the pose and to do it as quickly as possible. I had no knowledge of asana form or the benefits of a full yoga practice. I was just looking for a way to get a good workout and relieve some stress while I was going through studying hell. After a few months of copying poses, and playing around with advanced variations of things I could kind of do, I found out about online yoga classes. I joined a subscription service called Yogaglo and started practicing every day under some of the best teachers I could imagine. There weren’t many advanced classes where I was living at the time and I was still in the mindset that being the most advanced was the best, so I really got into trying out all the classes various online subscription services had to offer. "Yoga is not a work-out, it is a work-in. And this is the point of spiritual practice; to make us teachable; to open up our hearts and focus our awareness so that we can know what we already know and be who we already are.” — Rolf Gates I got hooked on yoga and was practicing daily. I loved the discipline of the practice and also the playfulness of the flows. Because I had a dance background and also cheered, I was familiar with backbends, splits, drop backs, and things of that nature. What I was not familiar with is form and I developed some dangerous habits. Pushing myself too hard without worrying about building strength to support my flexibility, for example. That led to several injuries and setbacks, but because I had joined an online yoga community, I was learning the basics. I just hadn’t learned an appreciation for them. I didn't have the money at the time to visit a studio regularly, so I would often pop in for donation based community yoga classes. However, I wasn’t physically challenged and often found myself hiding in the back for fear of feeling like a show off. Regardless I knew that I could either keep doing the poses at home and maybe figure out how to do them correctly on my own, or I could suck it up, and get the proper alignment cues and form correction that I needed. That's the only way I would get stronger and more advanced in my practice. Just like any physical activity, if you start off doing it wrong, you will continue to do it wrong, and are at greater risk of injury. I figured that out pretty quickly. In time, I saved up money and started working with a teacher one on one on a regular basis in addition to taking online classes and the occasional donation class at the local studio. He suggested some reading material (the Hatha Yoga Pradipika), and it peaked my interest so I read more. I read about yoga anatomy, I read the works of Patanjali, and I couldn’t get enough. I was starting to understand that there was more to this practice than just a series of poses and that the advanced poses that look impressive, just aren’t the point. I was starting to grasp the benefits of the practice overall. I was learning through practicing with my teacher (who rarely let me do advanced poses with him) that a solid foundation was key. In school you can’t do algebra without learning how to add and subtract. In yoga, you can’t advance your asana until you learn the foundations of the poses. The more I practiced what are considered the basic yoga poses, or the more beginner poses, the more the accessible the advance postures became. The more I practiced them, the more focused I became; my mind would clear and I learned how to breathe through temporary discomfort. The more I practiced the foundational poses, the more I started to learn about the importance of building internal and external strength to support both my physical and mental goals. And the more I practiced, the more benefits I started noticing in my physical and mental health. My overall outlook on life even improved. One pose in particular, pincha mayurasana, that’s why I started doing yoga. I stayed, because I realized the lessons I learned about my body while practicing poses mirrored the lessons I was learning in my life. It took time and hard work. I’ve even had a few injuries from trying to do stupid stuff I wasn’t ready for. In the end, though, that’s the beauty of this practice, every trip to my mat is a new chance to learn through my practice. All the best, Cheryl |
AuthorI'm Cheryl. I moved to California from Vermont in 2015, gave up the path I'd spent years planning for, and started down a road to a happier, more fulfilling life. Goodbye suits and courtrooms, hello bare feet and yoga mats. After a few years, a couple of cross country moves, and a broken heart, I know I don't have all the answers, but I'm slowly starting to get the hang of things. :) I'm just taking things one day at a time, trying to figure out how to live my best life and help others do the same. Archives
December 2018
Categories
All
|
 RSS Feed